
Project comparison
The project comparison page allows you to display individual ad testing reports next to each other. This view has no limitations on the number of reports, making it easy to contrast performance, identify trends, and analyze different creative executions in one place.
How to compare projects
To start comparing your results, you first need to select the reports you want to see.
1. Select your projects
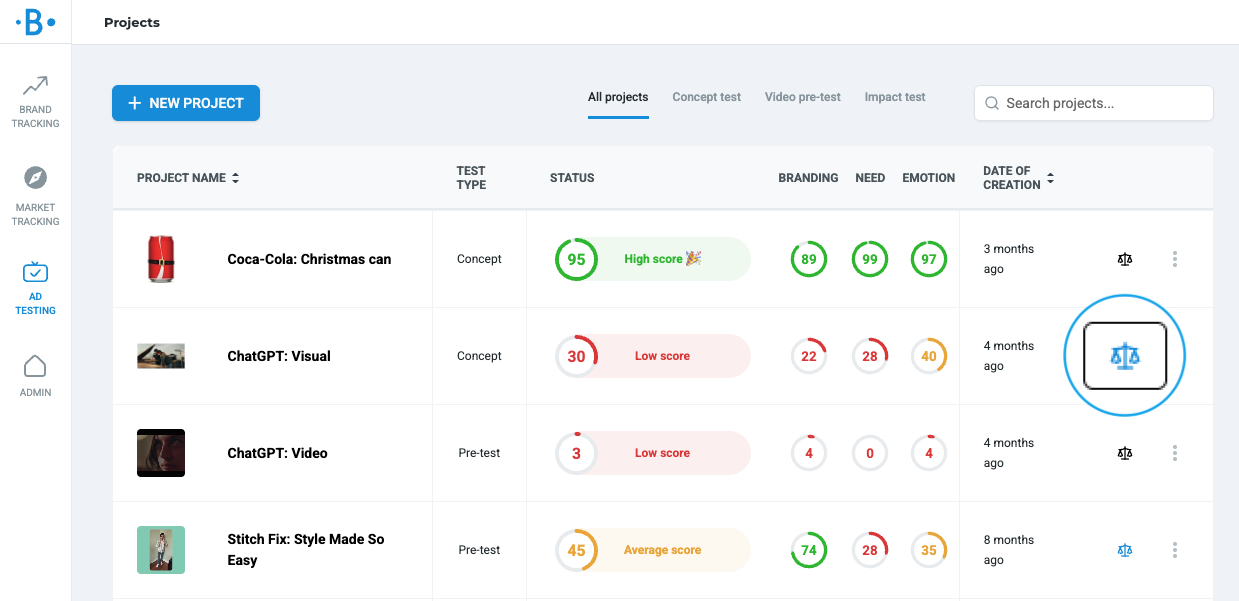
In the report overview, every project containing a final report features a ⚖️ comparison icon.
- Click the icon to add the report to your comparison list.
- When a report is selected, the icon will turn blue.
2. Open the comparison page
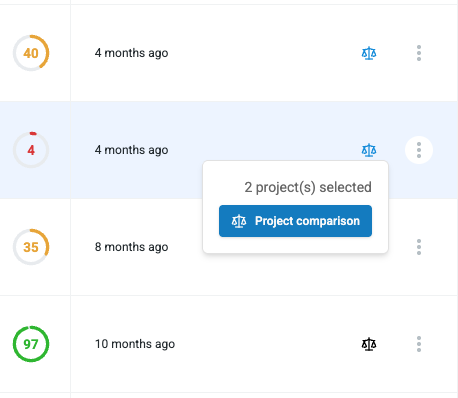
Once you have marked two or more projects for comparison, hover your mouse over the comparison icon. A button will appear—click it to be taken directly to the project comparison page.
Navigating the comparison view
On this page, your selected projects are rendered side-by-side. To help you analyze the data efficiently, the interface offers flexible navigation:
- Independent scrolling: You can scroll through each report individually to look at specific details.
- Individual control bars: Each project has its own set of tools located in a dedicated control bar at the top of the report.
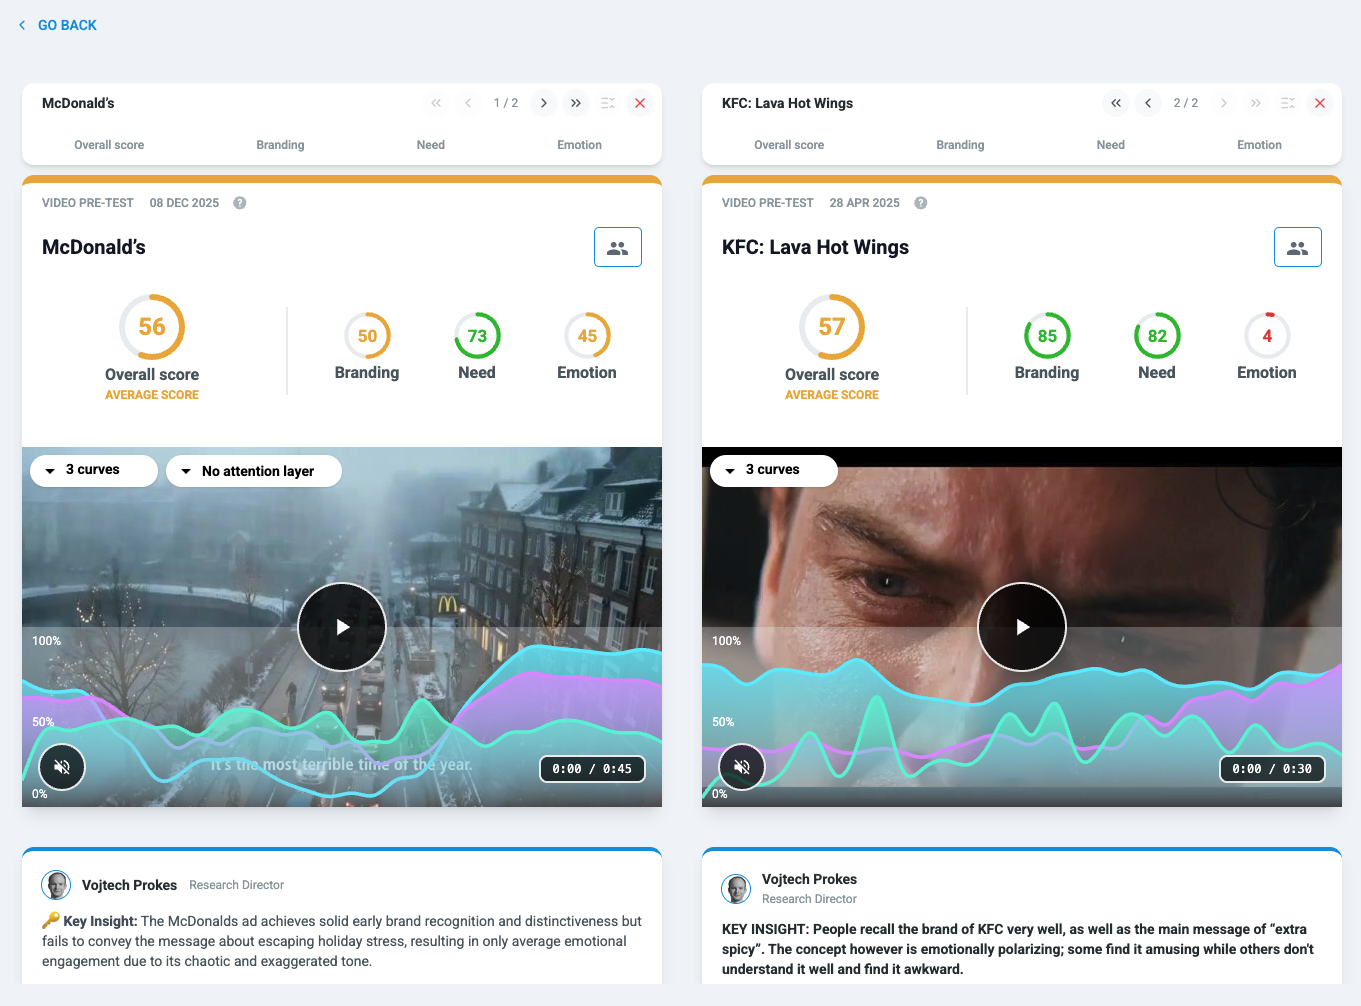
Control bar features

The control bar allows you to manage how you view and organize your reports:
- Quick Anchors: Use the labels (Overall score/Ad impact, Branding, Need, Emotion) to jump instantly to that specific section within a single report.
Right above the anchors, you'll find icons that allow you to:
- Reorder Reports: Use the arrows to change the horizontal order of the reports on the page.
- Sync Scroll: If you want to align all reports to the same section simultaneously, click the Sync scroll icon.
- Remove Reports: Click the ❌ icon to remove a specific report from the comparison view.